Hello everyone! Here is my first project that I will be sharing with you all. It's been a long time since I've done my crafty magic, but I think we are off to a good start! I wanted to make some wall art that wouldn't take too long to make. There's an empty wall staring at me screaming Hey lady!! I need something! Here's my Key Wall Art, I hope you like it, and try it!
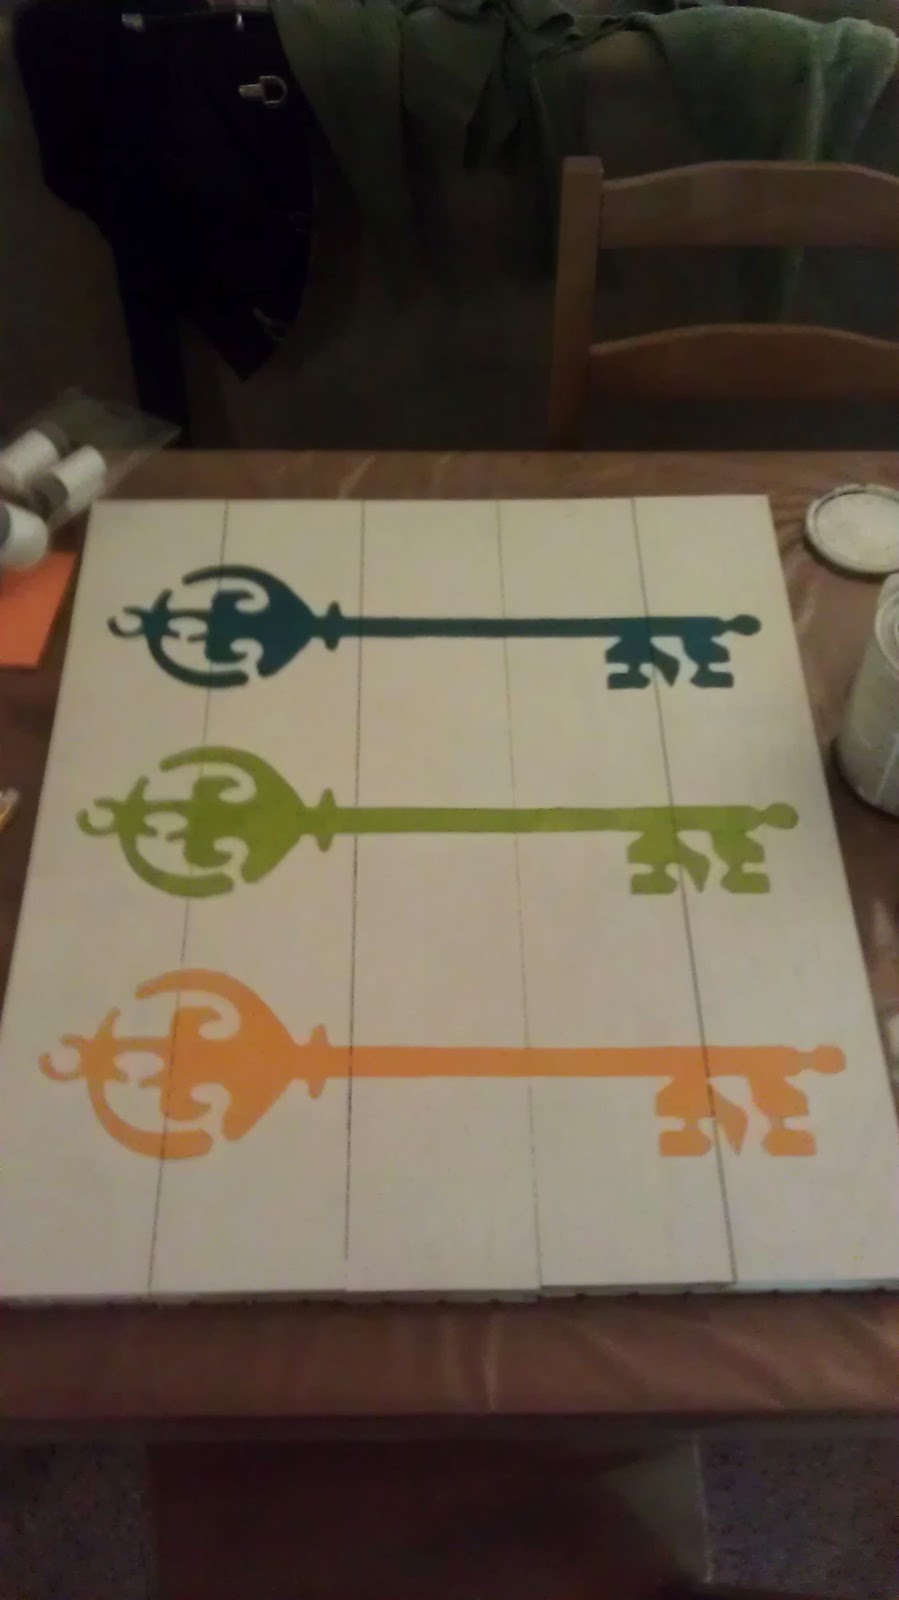 |
| This is the finished product! You can use whatever 3 shades of color you want, and the background color can be different as well. It's your project! Make it your own. |
 |
| Please be safe when using an xacto knife. They are very sharp. |
First, I went online looking for the right key. Just a design that caught my eye. I saved the image and "blew it up" on PhotoShop. Printed it out. Two separate sheets because of size. I only have a little regular printer! I used glue stick to glue it to what eventually would be my stencil. For the stencil, I bought a package of binding covers. I wanted something sturdy but that I would be able to cut out the stencil easily.


 |
| This is the finished stencil. |

Once that was done, I moved on to the board I would be painting these on. I didn't want a flat surface, so what I did, or what my handy fiance did, was he glued floor boards together. You can go to any flooring place and ask them if they have any extra ones they can let go, or sample sizes they don't need any more. If not you will have to purchase them. I didn't want the natural color of the wood so I painted it.

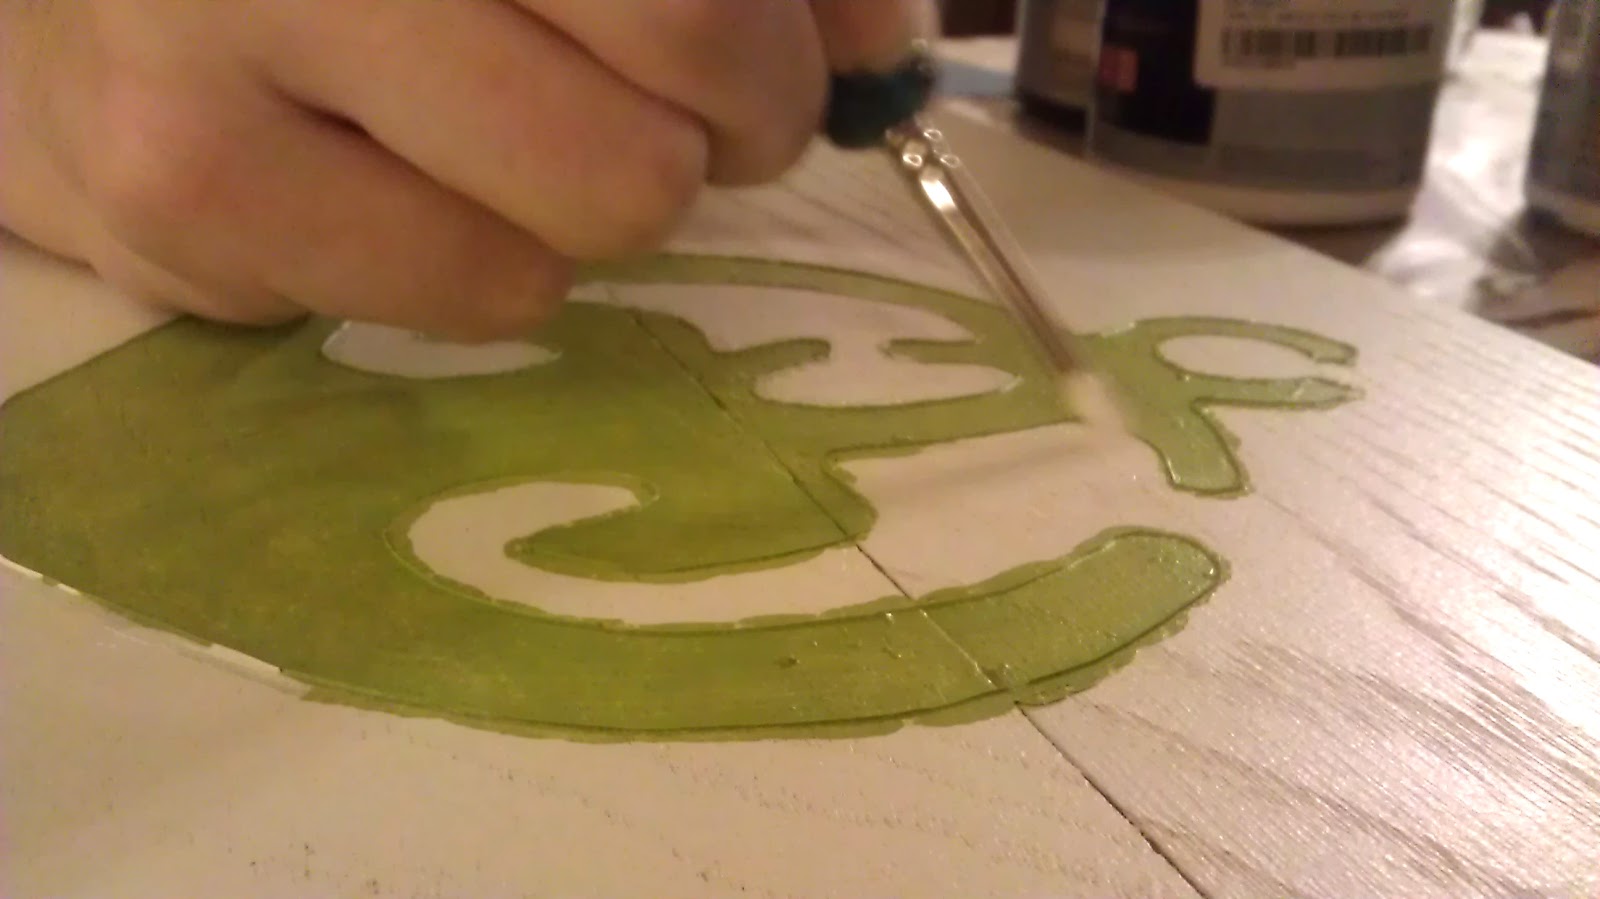
Once the paint is dry, carefully remove the tape and stencil. You will notice that some of the paint has bled under the stencil. Oh no! No worries. This will happen. Just take a small brush, and detail any little areas that need correcting.
 |
| This is what I'm talking about when I say some of the paint will bleed under the stencil. |
 |
| Be patient when correcting, don't want to rush it. |
 |
| Your first stencil is done. Now just repeat two more times and you'll be done! |
Once you are done with the last two keys, you are done!

I hope you enjoyed the crafty process and the end result! Thank you for reading!
No comments:
Post a Comment